基于LocalStack本地学习AWS
配置
皆为windows下的配置
首先要有github学生包,最近更新了,免费使用localstack进行本地aws相关开发,不用真的买存储桶
按照教程配置即可入门 - LocalStack — Getting Started - LocalStack
需要注意的是,需要有docker环境,可以用wsl2加DockerDesktop
配置好后会有个本地的aws环境,在http://localhost:4566下
学习
先学习点基本的aws相关开发以及使用
s3存储桶
-
创建存储桶
aws s3 mb s3://my-local-bucket --endpoint-url=http://localhost:4566 -
列出存储桶
aws s3 ls --endpoint-url=http://localhost:4566结果
2025-10-05 17:33:21 my-local-bucket -
删除存储桶
aws s3 rb s3://my-local-bucket --force --endpoint-url=http://localhost:4566 -
上传文件
先创建文件,例如
hello.txt,然后运行aws s3 cp hello.txt s3://my-local-bucket/ --endpoint-url=http://localhost:4566PS C:\Users\ENOCH\Desktop\localstack> aws s3 cp hello.txt s3://my-local-bucket/ --endpoint-url=http://localhost:4566 upload: .\hello.txt to s3://my-local-bucket/hello.txt列出桶内文件
PS C:\Users\ENOCH\Desktop\localstack> aws s3 ls s3://my-local-bucket/ --endpoint-url=http://localhost:4566 2025-10-05 17:39:09 9 hello.txt -
下载文件
aws s3 cp s3://my-local-bucket/hello.txt downloaded.txt --endpoint-url=http://localhost:4566
Lambda无服务器计算
创建函数lambda_function.py内容如下
import json

def lambda_handler(event, context):
    print("Lambda function invoked!")
    print(f"Received event: {json.dumps(event)}")
    return {
        'statusCode': 200,
        'body': json.dumps('Hello from your local Lambda!')
    }
将其压缩为lambda_function.zip然后运行命令(powershell下)
aws --endpoint-url=http://localhost:4566 lambda create-function `
    --function-name my-lambda-function `
    --zip-file fileb://lambda_function.zip `
    --handler lambda_function.lambda_handler `
    --runtime python3.8 `
    --role arn:aws:iam::000000000000:role/lambda-role
有类似回显说明成功了
{
    "FunctionName": "my-lambda-function",
    "FunctionArn": "arn:aws:lambda:us-east-1:000000000000:function:my-lambda-function",
    "Runtime": "python3.8",
    "Role": "arn:aws:iam::000000000000:role/lambda-role",
    "Handler": "lambda_function.lambda_handler",
    "CodeSize": 340,
    "Description": "",
    "Timeout": 3,
    },
    "SnapStart": {
        "ApplyOn": "None",
    },
    "RuntimeVersionConfig": {
        "RuntimeVersionArn": "arn:aws:lambda:us-east-1::runtime:8eeff65f6809a3ce81507fe733fe09b835899b99481ba22fd75b5a7338290ec1"
    },
    "LoggingConfig": {
        "LogFormat": "Text",
        "LogGroup": "/aws/lambda/my-lambda-function"
    }
}
调用函数
PS C:\Users\ENOCH\Desktop\localstack> aws lambda invoke --function-name my-lambda-function response.json --endpoint-url=http://localhost:4566
{
    "StatusCode": 200,
    "ExecutedVersion": "$LATEST"
}
其中输出的response.json如下
{"statusCode": 200, "body": "\"Hello from your local Lambda!\""}
但是这样子似乎只能用命令行调用,我们需要部署 API Gateway
首先更新一下lambda_function.py
import json

def lambda_handler(event, context):
    print(f"Received event: {json.dumps(event)}")

    name = "World"
    if event.get("queryStringParameters"):
        name = event["queryStringParameters"].get("name", "World")

    message = f"Hello, {name}!"

    return {
        'statusCode': 200,
        'headers': {
            'Content-Type': 'application/json'
        },
        'body': json.dumps({
            'message': message
        })
    }
这将会从name参数中取出名字拼接到message最后输出
压缩,部署函数
创建REST API并获取id
$api = aws --endpoint-url=http://localhost:4566 apigateway create-rest-api --name "My Test API" | ConvertFrom-Json
$API_ID = $api.id
echo "API ID: $API_ID"
输出API ID: asefmygkar
获取API根资源ID
$resources = aws --endpoint-url=http://localhost:4566 apigateway get-resources --rest-api-id $API_ID | ConvertFrom-Json
$ROOT_RESOURCE_ID = $resources.items.id
echo "Root Resource ID: $ROOT_RESOURCE_ID"
输出Root Resource ID: vrpdbnnzow`
根下创建invoke资源
$invoke_resource = aws --endpoint-url=http://localhost:4566 apigateway create-resource --rest-api-id $API_ID --parent-id $ROOT_RESOURCE_ID --path-part "invoke" | ConvertFrom-Json
$INVOKE_RESOURCE_ID = $invoke_resource.id
echo "Invoke Resource ID: $INVOKE_RESOURCE_ID"
添加get方法
aws --endpoint-url=http://localhost:4566 apigateway put-method --rest-api-id $API_ID --resource-id $INVOKE_RESOURCE_ID --http-method GET --authorization-type "NONE"
关联到函数
aws --endpoint-url=http://localhost:4566 apigateway put-integration `
    --rest-api-id $API_ID `
    --resource-id $INVOKE_RESOURCE_ID `
    --http-method GET `
    --type AWS_PROXY `
    --integration-http-method POST `
    --uri "arn:aws:apigateway:us-east-1:lambda:path/2015-03-31/functions/arn:aws:lambda:us-east-1:000000000000:function:my-lambda-function/invocations"
部署到dev
aws --endpoint-url=http://localhost:4566 apigateway create-deployment --rest-api-id $API_ID --stage-name dev
然后便可以访问
http://localhost:4566/restapis/<API_ID>/dev/_user_request_/invoke
例如我这里的是http://localhost:4566/restapis/asefmygkar/dev/_user_request_/invoke?name=Enoch
访问得到的结果便是
{"message": "Hello, Enoch!"}
至此完成了整个函数的部署与上线
DynamoDB
这是一个NoSQL 数据库,适合与Lambda函数集成
创建Users表
aws dynamodb create-table `
    --table-name Users `
    --attribute-definitions AttributeName=username,AttributeType=S `
    --key-schema AttributeName=username,KeyType=HASH `
    --provisioned-throughput ReadCapacityUnits=1,WriteCapacityUnits=1 `
    --endpoint-url http://localhost:4566
项目
再次更新函数,这次集成数据库,完成注册登录功能
import json
import boto3
import os
import base64
import hashlib
import hmac
from botocore.exceptions import ClientError
from typing import Optional

endpoint_url = "http://localhost:4566" if os.environ.get("AWS_EXECUTION_ENV") is None else None

dynamodb = boto3.resource('dynamodb', endpoint_url=endpoint_url)
table = dynamodb.Table('Users')

PBKDF2_ITERATIONS = 200_000

def hash_password(password: str, salt_b64: Optional[str] = None, iterations: int = PBKDF2_ITERATIONS):
    if salt_b64 is None:
        salt = os.urandom(16)
    else:
        salt = base64.b64decode(salt_b64)
    dk = hashlib.pbkdf2_hmac('sha256', password.encode('utf-8'), salt, iterations)
    return base64.b64encode(dk).decode('utf-8'), base64.b64encode(salt).decode('utf-8'), iterations

def verify_password(password: str, stored_hash_b64: str, salt_b64: str, iterations: int) -> bool:
    calc_hash_b64, _, _ = hash_password(password, salt_b64, iterations)
    return hmac.compare_digest(calc_hash_b64, stored_hash_b64)

def lambda_handler(event, context):
    path = event.get('path', '')
    try:
        body = json.loads(event.get('body', '{}') or '{}')
        username = body.get('username')
        password = body.get('password')

        if not username or not password:
            return create_response(400, "Username and password are required.")

        if path.endswith('/register'):
            try:
                pwd_hash, salt_b64, iters = hash_password(password)
                table.put_item(
                    Item={
                        'username': username,
                        'password_hash': pwd_hash,
                        'password_salt': salt_b64,
                        'password_iters': iters
                    },
                    ConditionExpression='attribute_not_exists(username)'
                )
                return create_response(201, "User registered successfully.")
            except ClientError as e:
                if e.response['Error']['Code'] == 'ConditionalCheckFailedException':
                    return create_response(409, "Username already exists.")
                raise

        elif path.endswith('/login'):
            res = table.get_item(Key={'username': username})
            item = res.get('Item')
            if not item:
                return create_response(404, "User not found.")

            stored_hash = item.get('password_hash')
            salt_b64 = item.get('password_salt')
            iters = int(item.get('password_iters', PBKDF2_ITERATIONS))
            if salt_b64 and stored_hash and verify_password(password, stored_hash, salt_b64, iters):
                return create_response(200, "Login successful.")
            return create_response(401, "Invalid credentials.")

        else:
            return create_response(404, "Not Found.")

    except json.JSONDecodeError:
        return create_response(400, "Invalid JSON format in request body.")
    except Exception as e:
        print(f"Unhandled error: {e}")
        return create_response(500, "Internal Server Error.")

def create_response(status_code, message):
    return {
        'statusCode': status_code,
        'headers': {
            'Access-Control-Allow-Origin': '*',
            'Access-Control-Allow-Headers': 'Content-Type',
            'Access-Control-Allow-Methods': 'POST,OPTIONS',
            'Content-Type': 'application/json'
        },
        'body': json.dumps({'message': message})
    }
然后压缩部署
aws --endpoint-url=http://localhost:4566 lambda update-function-code `
  --function-name my-lambda-function `
  --zip-file fileb://lambda_function.zip
然后部署
cd ..
aws --endpoint-url=http://localhost:4566 lambda update-function-code `
    --function-name my-lambda-function `
    --zip-file fileb://lambda_function_with_deps.zip
还记得之前的API端点吗,继续沿用,并且加 /register 和 /login 两个 POST 方法
先创建文件
#创建 /register 资源和 POST 方法
$register_resource = aws --endpoint-url=http://localhost:4566 apigateway create-resource --rest-api-id $API_ID --parent-id $ROOT_RESOURCE_ID --path-part "register" | ConvertFrom-Json
aws --endpoint-url=http://localhost:4566 apigateway put-method --rest-api-id $API_ID --resource-id $register_resource.id --http-method POST --authorization-type "NONE"
aws --endpoint-url=http://localhost:4566 apigateway put-integration --rest-api-id $API_ID --resource-id $register_resource.id --http-method POST --type AWS_PROXY --integration-http-method POST --uri "arn:aws:apigateway:us-east-1:lambda:path/2015-03-31/functions/arn:aws:lambda:us-east-1:000000000000:function:my-lambda-function/invocations"

#创建 /login 资源和 POST 方法
$login_resource = aws --endpoint-url=http://localhost:4566 apigateway create-resource --rest-api-id $API_ID --parent-id $ROOT_RESOURCE_ID --path-part "login" | ConvertFrom-Json
aws --endpoint-url=http://localhost:4566 apigateway put-method --rest-api-id $API_ID --resource-id $login_resource.id --http-method POST --authorization-type "NONE"
aws --endpoint-url=http://localhost:4566 apigateway put-integration --rest-api-id $API_ID --resource-id $login_resource.id --http-method POST --type AWS_PROXY --integration-http-method POST --uri "arn:aws:apigateway:us-east-1:lambda:path/2015-03-31/functions/arn:aws:lambda:us-east-1:000000000000:function:my-lambda-function/invocations"

# 部署
aws --endpoint-url=http://localhost:4566 apigateway create-deployment --rest-api-id $API_ID --stage-name dev
现在我这里便有了两个端点
注册 URL: http://localhost:4566/restapis/asefmygkar/dev/_user_request_/register
登录 URL: http://localhost:4566/restapis/asefmygkar/dev/_user_request_/login
前端我们使用创建的s3存储桶来提供
首先创建index.html
<!DOCTYPE html>
<html lang="zh-CN">
<head>
  <meta charset="UTF-8" />
  <meta name="viewport" content="width=device-width,initial-scale=1" />
  <title>Serverless Auth</title>
  <style>
    :root { --bg:#f6f7f9; --card:#fff; --text:#1f2328; --muted:#6b7280; --border:#e5e7eb; --primary:#2563eb; --primary-600:#1d4ed8; }
    * { box-sizing: border-box; }
    body { margin:0; font-family: ui-sans-serif,system-ui,-apple-system,Segoe UI,Roboto,Helvetica,Arial; color:var(--text); background:linear-gradient(180deg,#fafafa, #f0f3f8); min-height:100vh; display:grid; place-items:center; }
    .card { width: min(92vw, 420px); background:var(--card); border:1px solid var(--border); border-radius:12px; box-shadow:0 6px 24px rgba(0,0,0,.06); overflow:hidden; }
    .header { padding:20px; text-align:center; border-bottom:1px solid var(--border); }
    .title { margin:0; font-size:20px; letter-spacing:.2px; }
    .tabs { display:flex; }
    .tab { flex:1; padding:12px 0; text-align:center; cursor:pointer; border-bottom:2px solid transparent; color:var(--muted); user-select:none; }
    .tab.active { color:var(--text); border-color:var(--primary); font-weight:600; }
    form { display:grid; gap:12px; padding:20px; }
    label { font-size:12px; color:var(--muted); }
    input { width:100%; padding:10px 12px; border:1px solid var(--border); border-radius:8px; font-size:14px; outline:none; background:#fff; }
    input:focus { border-color:var(--primary); box-shadow:0 0 0 3px rgba(37,99,235,.12); }
    button { padding:10px 14px; border:0; border-radius:8px; background:var(--primary); color:#fff; font-weight:600; cursor:pointer; }
    button:hover { background:var(--primary-600); }
    .msg { padding:12px 16px; margin:0 20px 20px; border-radius:8px; display:none; font-size:14px; }
    .msg.ok { display:block; background:#ecfdf5; color:#065f46; border:1px solid #a7f3d0; }
    .msg.err { display:block; background:#fef2f2; color:#991b1b; border:1px solid #fecaca; }
    .footer { text-align:center; color:var(--muted); font-size:12px; padding:0 0 16px; }
  </style>
</head>
<body>
  <main class="card">
    <div class="header">
      <h1 class="title">Serverless 认证</h1>
    </div>

    <div class="tabs">
      <div id="tab-login" class="tab active">登录</div>
      <div id="tab-register" class="tab">注册</div>
    </div>

    <form id="loginForm" autocomplete="on">
      <div>
        <label for="loginUsername">用户名</label>
        <input id="loginUsername" name="username" type="text" placeholder="yourname" required autocomplete="username" />
      </div>
      <div>
        <label for="loginPassword">密码</label>
        <input id="loginPassword" name="password" type="password" placeholder="••••••••" required autocomplete="current-password" />
      </div>
      <button type="submit">登录</button>
    </form>

    <form id="registerForm" style="display:none" autocomplete="on">
      <div>
        <label for="registerUsername">用户名</label>
        <input id="registerUsername" name="username" type="text" placeholder="yourname" required autocomplete="username" />
      </div>
      <div>
        <label for="registerPassword">密码</label>
        <input id="registerPassword" name="password" type="password" placeholder="至少 8 位" minlength="8" required autocomplete="new-password" />
      </div>
      <button type="submit">注册</button>
    </form>

    <p id="message" class="msg"></p>
    <div class="footer">通过 API Gateway + Lambda + DynamoDB 实现用户认证</div>
  </main>

  <script>
    const API_ID = 'asefmygkar';
    const API_BASE_URL = `http://localhost:4566/restapis/${API_ID}/dev/_user_request_`;

    const el = {
      tabLogin: document.getElementById('tab-login'),
      tabRegister: document.getElementById('tab-register'),
      loginForm: document.getElementById('loginForm'),
      registerForm: document.getElementById('registerForm'),
      msg: document.getElementById('message')
    };

    function setTab(which) {
      const isLogin = which === 'login';
      el.tabLogin.classList.toggle('active', isLogin);
      el.tabRegister.classList.toggle('active', !isLogin);
      el.loginForm.style.display = isLogin ? '' : 'none';
      el.registerForm.style.display = isLogin ? 'none' : '';
      clearMsg();
    }

    function showMsg(ok, text) {
      el.msg.className = 'msg ' + (ok ? 'ok' : 'err');
      el.msg.textContent = text;
    }
    function clearMsg() { el.msg.className = 'msg'; el.msg.textContent = ''; }

    el.tabLogin.addEventListener('click', () => setTab('login'));
    el.tabRegister.addEventListener('click', () => setTab('register'));

    async function handleAuth(endpoint, data, btn) {
      try {
        btn.disabled = true;
        clearMsg();
        const res = await fetch(`${API_BASE_URL}/${endpoint}`, {
          method: 'POST',
          headers: { 'Content-Type': 'application/json' },
          body: JSON.stringify(data)
        });
        const result = await res.json().catch(() => ({}));
        showMsg(res.ok, result.message || (res.ok ? '成功' : '请求失败'));
      } catch (e) {
        showMsg(false, '网络错误,请稍后重试');
        console.error(e);
      } finally {
        btn.disabled = false;
      }
    }

    el.loginForm.addEventListener('submit', (e) => {
      e.preventDefault();
      const btn = e.submitter || e.target.querySelector('button[type="submit"]');
      const username = e.target.username.value.trim();
      const password = e.target.password.value;
      handleAuth('login', { username, password }, btn);
    });

    el.registerForm.addEventListener('submit', (e) => {
      e.preventDefault();
      const btn = e.submitter || e.target.querySelector('button[type="submit"]');
      const username = e.target.username.value.trim();
      const password = e.target.password.value;
      handleAuth('register', { username, password }, btn);
    });
  </script>
</body>
</html>
然后创建存储桶并放进去
aws s3 mb s3://my-serverless-auth-page --endpoint-url=http://localhost:4566
aws s3 cp index.html s3://my-serverless-auth-page/index.html --endpoint-url=http://localhost:4566
最后还要设置权限公开
先创建policy.json
{
    "Version": "2012-10-17",
    "Statement": [
        {
            "Sid": "PublicReadGetObject",
            "Effect": "Allow",
            "Principal": "*",
            "Action": "s3:GetObject",
            "Resource": "arn:aws:s3:::my-serverless-auth-page/*"
        }
    ]
}
执行
aws s3api put-bucket-policy --bucket my-serverless-auth-page --policy file://policy.json --endpoint-url=http://localhost:4566
现在便可以访问http://localhost:4566/my-serverless-auth-page/index.html
当然这样子未免有点麻烦,如果有对应域名就好了
运行
aws s3 website s3://my-serverless-auth-page --index-document index.html --endpoint-url=http://localhost:4566
然后便可以通过http://my-serverless-auth-page.s3-website.localhost.localstack.cloud:4566来访问web界面了
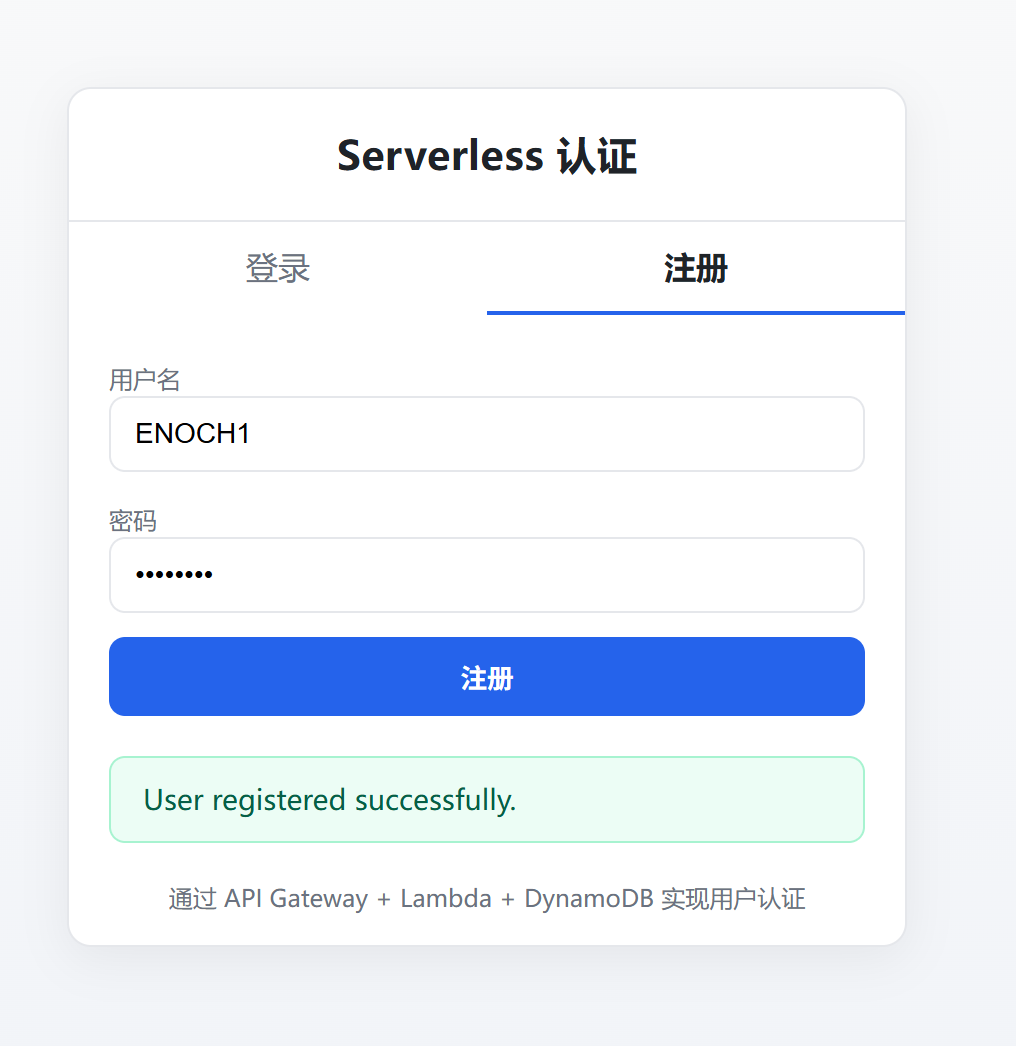
可以看到能成功注册登录了

如果这里遇到跨域问题,则需要配置相应的跨域请求头,似乎有点麻烦
或者访问
http://localhost:4566/my-serverless-auth-page/index.html便不会遇到跨域问题
至此,便学会了基础的aws技术栈
然后便可以研究研究各种策略,函数相关的安全问题了